Overlays in Photoshop (I’m getting nervous here…….)
Ok, so I know I am bad at photoshop. I have an outdated version I have used for over 7 years. But I really want to tell you guys how to do an overlay. I really enjoy these and I think you will too. So, here goes….
You ask, what is an overlay?
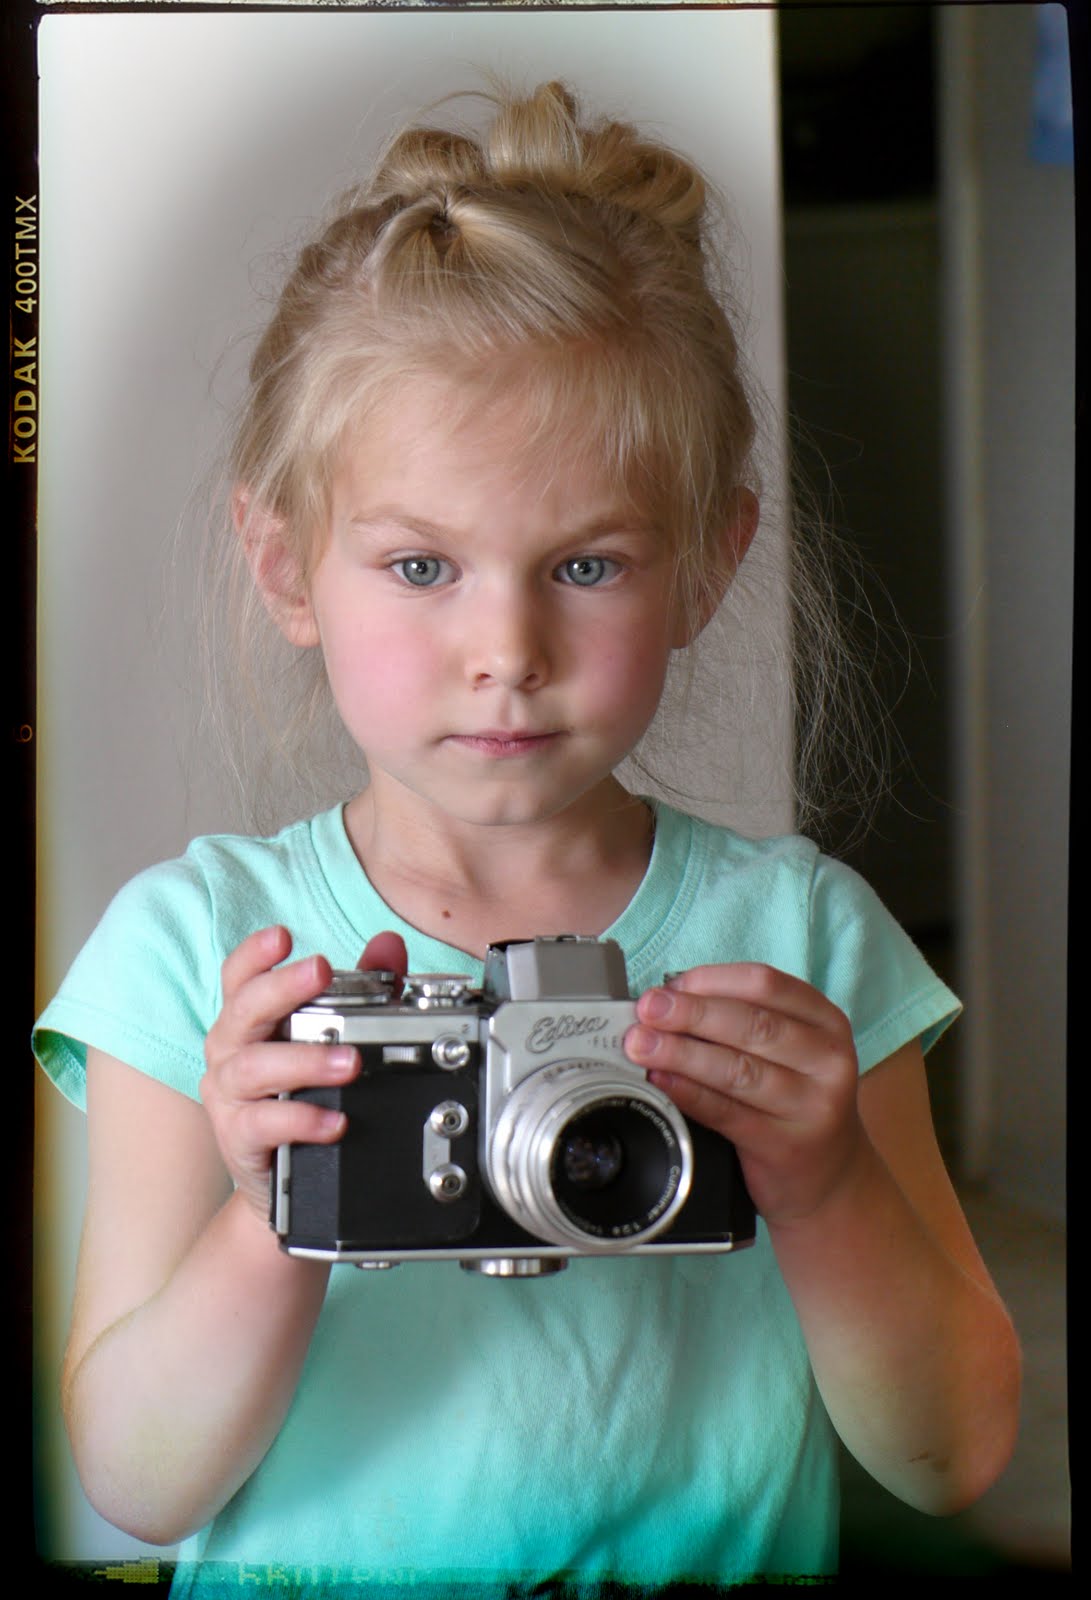
This is an overlay.
You do this by merging two images into one.
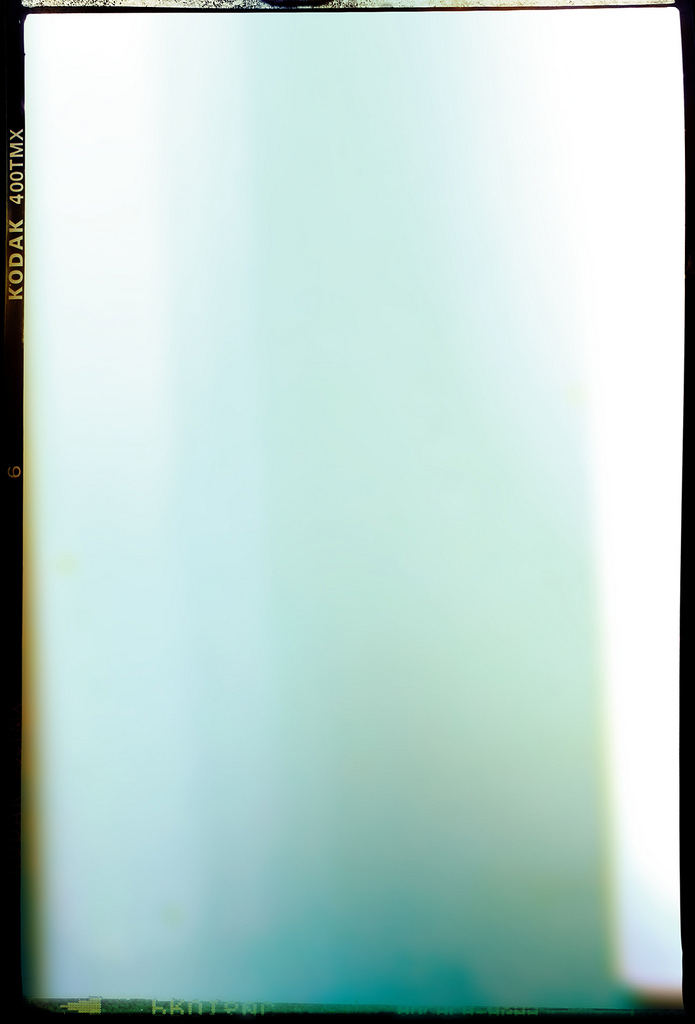
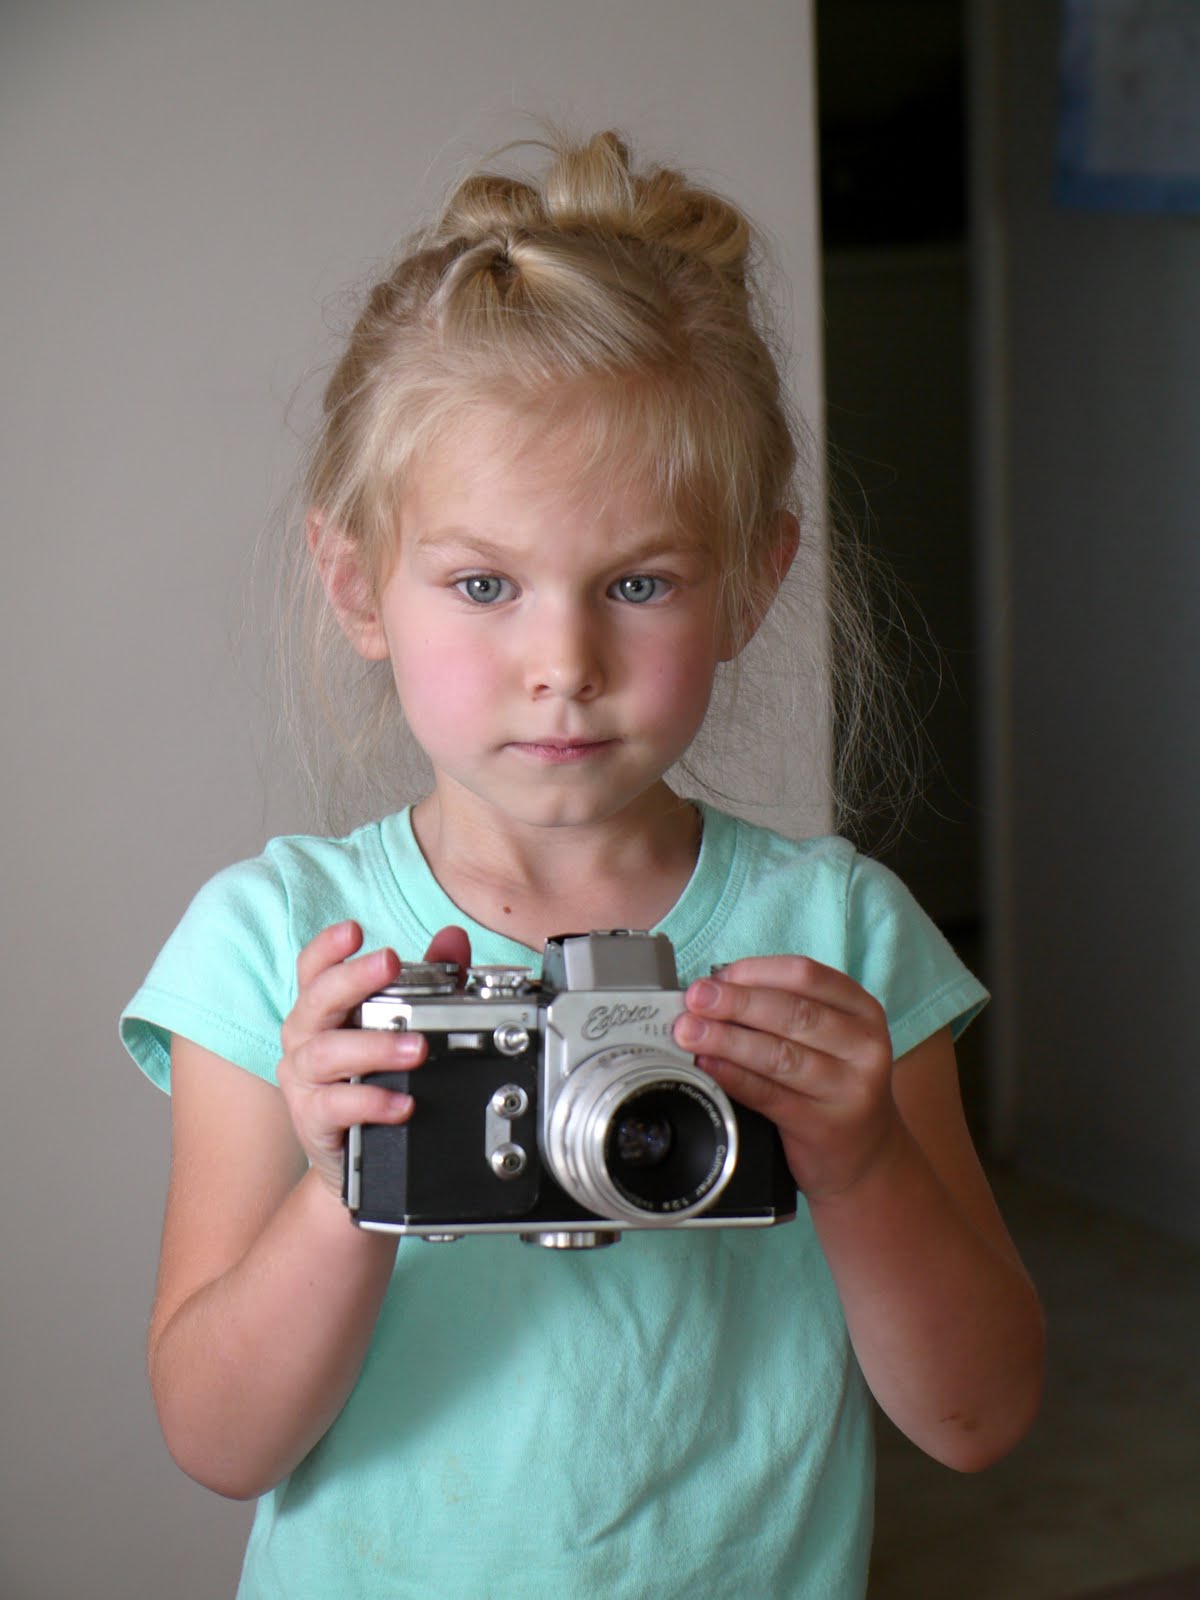
Here are the two images I used to make this one photo.
2nd Lesson on F-stops: Shallow Depth of Field.
A while ago I had a visitor who was wanting to know more about when to use f-stops. I covered what f-stop to use when taking a landscape(f/11-f/22). Now I am going to show you when you want to use a larger aperture. The photo below was taken using f/2.8. Some lenses will not have f/2.8. The might only go to f/4. If you have a camera that has f/4 as the largest aperture, substitute f/4 for f/2.8. Anyway this is my little boy holding grass (not the kind you smoke) ha ha ha. I used f/2.8 because I wanted to throw him out a focus and bring attention to the grass he was holding. So, when you want attention brought to a subject and you want shallow depth of field, use a large aperture like f/2.8 -f-5.6. The resulting style is sometimes referred to as Bokeh.
Just for some basic info, when shooting a portrait of a person, most pro photographers use f/8. Why you ask? Because f/8 gives enough depth of field to cover the head of a person and throw the background out of focus. Hope you liked this tutorial. If you have any questions let me know and I will do my best to answer them. Remember to bookmark this page so you can come back often. Thanks 🙂

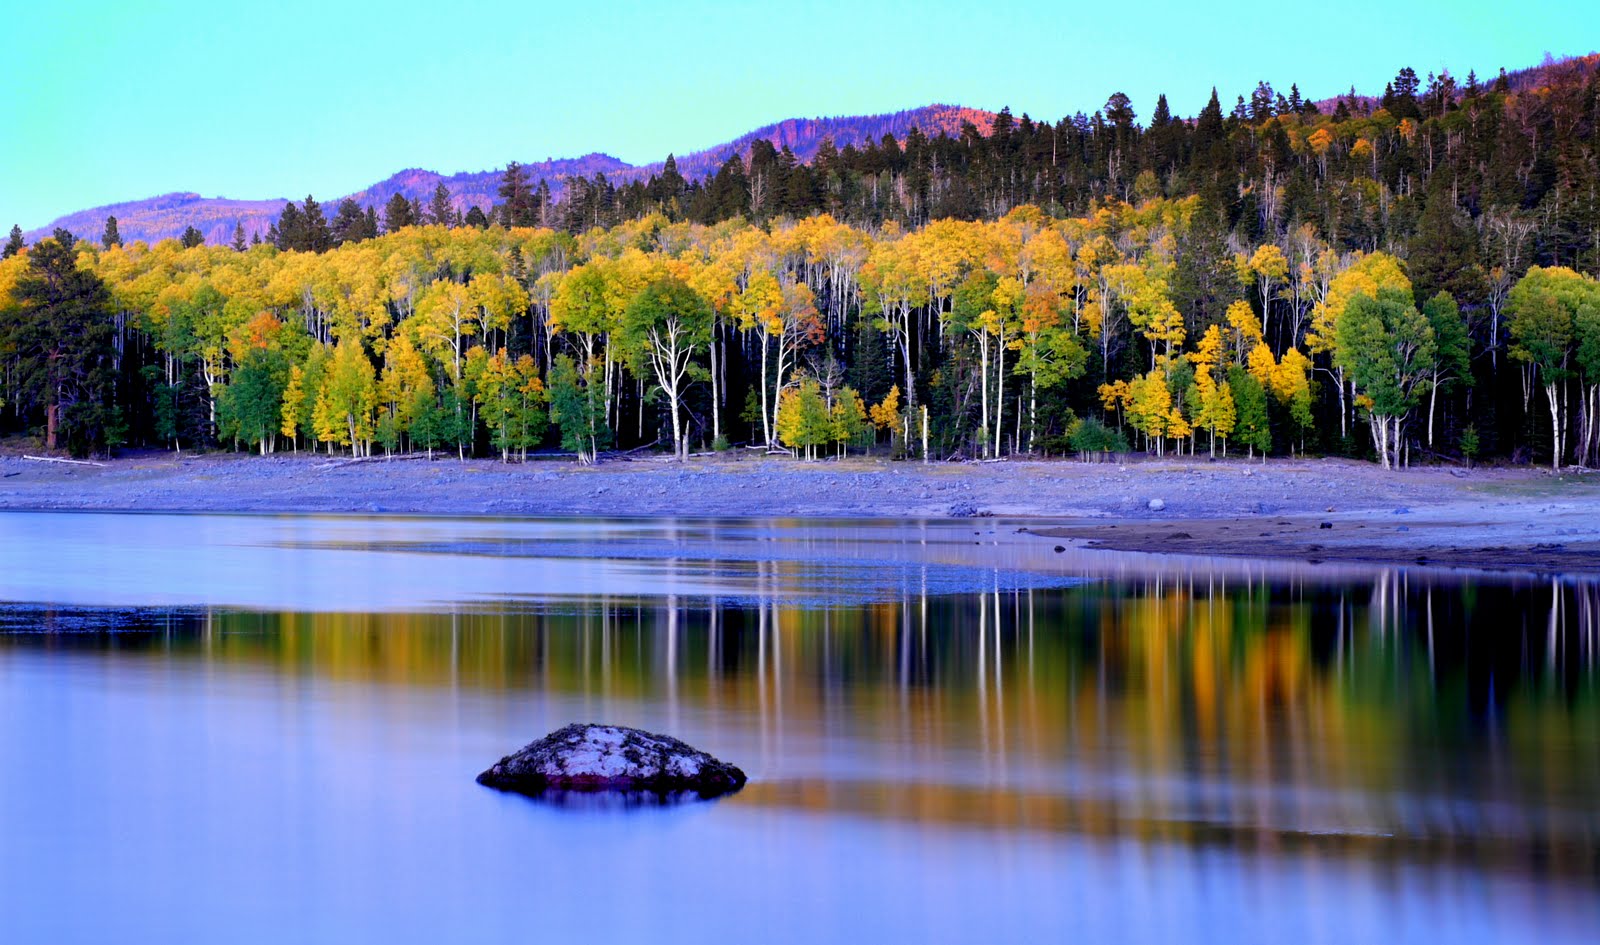
My Favorite Time of Day to Shoot in Autumn
So, most of the time when you ask a professional how to get the most of your photos in autumn, you will hear two things:
1. On an overcast day, shoot in the woods.
2. On a sunny day shoot landscapes, or out of the woods.
Well, I am going to say something a little different.
Shoot at night, or right after the sun goes down.
I know, it takes more effort, and you have to drive home in the dark and, well there are a lot of other excuses.
I think that when you shoot at night, there is a whole other world you get to be a part of. You really should try it.
I think you will be pleasantly surprised.
Oh, and make sure you use a tripod.
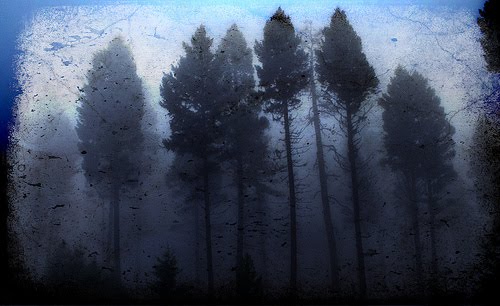
Here is one of my shots I took at night.
It was taken at F/11 at 60 seconds
Mystic Forest
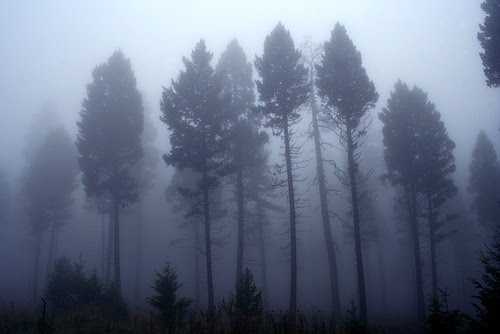
I took this photo about 2 years ago. The fog was pretty thick and it was very pretty. It was taken in Montana, near Missoula. This is one of those shots where I happened to have my camera with me. I always carry my camera now because you never know if you will miss a good shot. Luckily for me, I had my camera on me that day.
Flashing Yourself! (What?)


 unit.")
10 Tips for Better Photography!
Aperture: What is it?

My Favorite Place for Family Photos!!!!


Being a Bad Weather Friend!


Rule the World with the Rule of Thirds
If you want to get good at composition, you need to know about this rule. The rule of thirds is probably the most popular “rule” in art and photography. How does it work you ask? Well, imagine two lines dividing your photograph horizontally and two vertically.

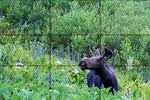
Above are examples of the Rule of Thirds at work. Notice the placement of the moose? The moose is placed where the lines intersect. This is the Rule of Thirds. You place your subject on one of the intersecting lines (click on the photos and you can see an enlarged version of them). Using the rule of thirds in this photo makes it more visually stimulating.
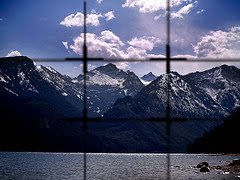
Notice in the photo of lake. Look where I placed the sky in this photo. This is the Rule of Thirds at work again. This rule works great for landscapes.

Recent Comments